Registering Your Database with the Directory
The next step is to register the database with the directory service. The Database Configuration Assistant (DBCA) tool enables you to register the database with Oracle Internet Directory.
To register the database with the directory:
-
Start DBCA using the
dbcacommand.-
On Windows, you can also start DBCA from the Start menu:
Click Start, All Programs, Oracle - OracleHomeName, Configuration and Migration Tools, Database Configuration Assistant.
-
On Unix systems, you can start DBCA using the following command:
$ORACLE_HOME/bin/dbca
The Welcome screen appears.
-
-
Click Next.
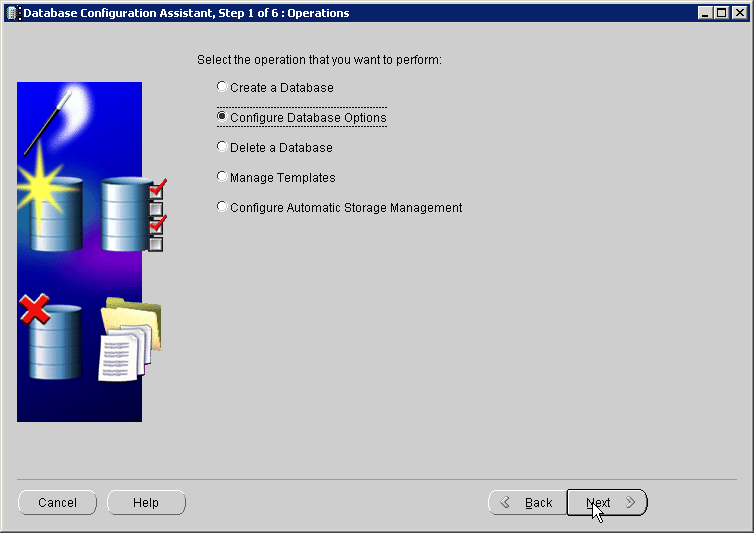
The Operations screen displays.
-
Select Configure Database Options. Click Next.
The Database screen appears.
-
Select the database name that you wish to configure. You might also be asked to enter
SYSuser credentials if you are not using operating system authentication. Click Next.The Management Options screen appears.
-
Select the management options, and click Next.
The Security Settings screen appears.
-
Select Keep the enhanced 12c default security settings to keep the Oracle Database 12c security settings. Click Next.
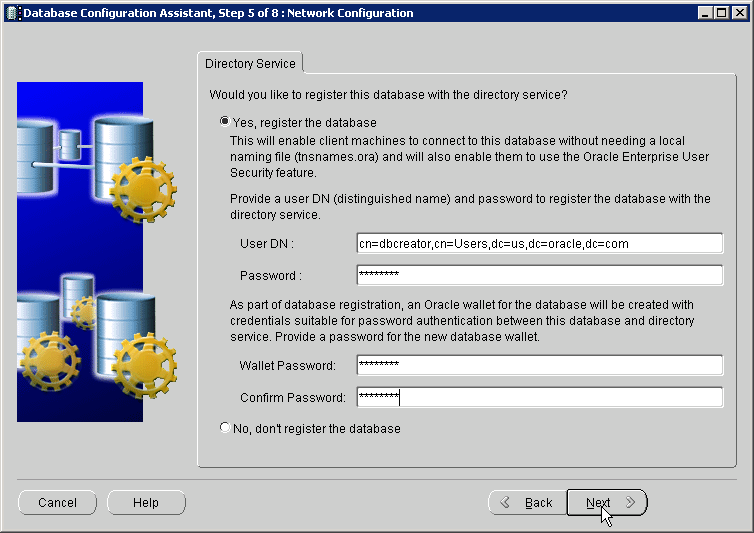
The Network Configuration screen appears.
-
Select Yes, register the database to register the database with the directory. Enter the distinguished name (DN) of a user who is authorized to register databases in Oracle Internet Directory. Also, enter the password for the directory user. Enter a wallet password. Reenter the password in the Confirm Password field. Click Next.
Note:
The database uses a randomly generated password to log in to the directory. This database password is stored in an Oracle wallet. The wallet can also be used to store certificates needed for SSL connections.
The wallet password that you specify is different from the database password. The wallet password is used to protect the wallet.
The Database Components screen appears.
-
Click Next.
The Connection Mode page appears.
-
Select Dedicated Server Mode or Shared Server Mode. Click Finish.
The Confirmation dialog box appears.
-
Click OK.
Note:
After you register the database with the directory, make sure that auto login is enabled for the database wallet. The default wallet is created in the $ORACLE_BASE/admin/database_sid/wallet directory.
You can verify that auto login for the wallet is enabled by checking for the presence of the cwallet.sso file in the wallet directory. If the file is not present, you can enable auto login by opening the wallet using Oracle Wallet Manager, and using the option to enable auto login for the wallet.

