Using Proxy Permissions
Proxy permissions are created at the enterprise domain level. Proxy permissions allow an enterprise user to proxy a local database user, which means that the enterprise user can log in to the database as the local database user. You can grant proxy permissions to individual enterprise users or groups. Proxy permissions are especially useful for middle-tier applications that operate across multiple databases as enterprise users.
Example 2-5 illustrates the use of proxy permissions. The enterprise user, joe is a sales manager and needs to log in to enterprise databases as the target database user, SH. The SH user owns the sample SH schema that contains Sales History related tables.
Example 2-5 Using Proxy Permissions
The first step in allowing enterprise user proxy is to ALTER the target database user to allow CONNECT through enterprise users. The following SQL statements unlock the SH database account, set a password for it, and ALTER the account to allow enterprise user proxy:
SQL> CONNECT SYSTEM
Enter password:
Connected.
SQL> ALTER USER SH IDENTIFIED BY hrd2guess ACCOUNT UNLOCK;
User altered.
SQL> ALTER USER SH GRANT CONNECT THROUGH ENTERPRISE USERS;
User altered.
Next, use Enterprise Manager to configure the proxy permission. This allows the enterprise user joe to connect as the local database user, SH.
To configure the proxy permission for enterprise user, joe:
-
Log in to Enterprise Manager Cloud Control, as an administrative user.
-
To navigate to your database, select Databases from the Targets menu.
-
Click the database name in the list that appears. The database page appears.
-
Under the Administration menu, select Security, Enterprise User Security. The Oracle Internet Directory Login page appears.
-
Enter the distinguished name (DN) of a directory user who can administer enterprise users in the User field. Enter the user password in the Password field. Click Login.
The Enterprise User Security page appears.
-
Click Manage Enterprise Domains.
The Manage Enterprise Domains page appears. This page lists the enterprise domains in the identity management realm.
-
Select the enterprise domain that you wish to configure. Click Configure.
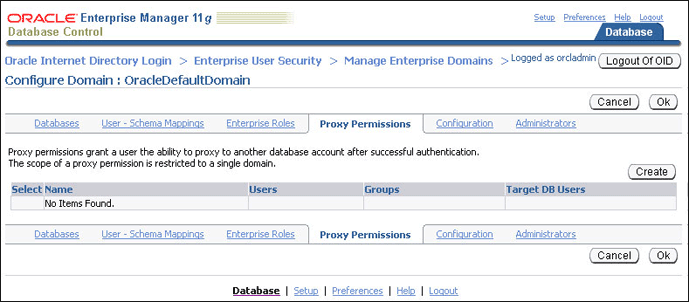
The Configure Domain page appears.
-
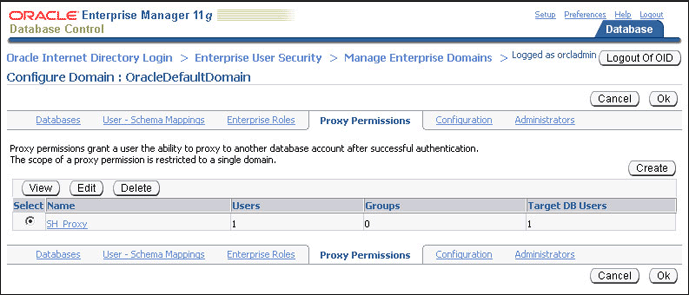
Click the Proxy Permissions tab.
-
Click Create to create a new proxy permission.
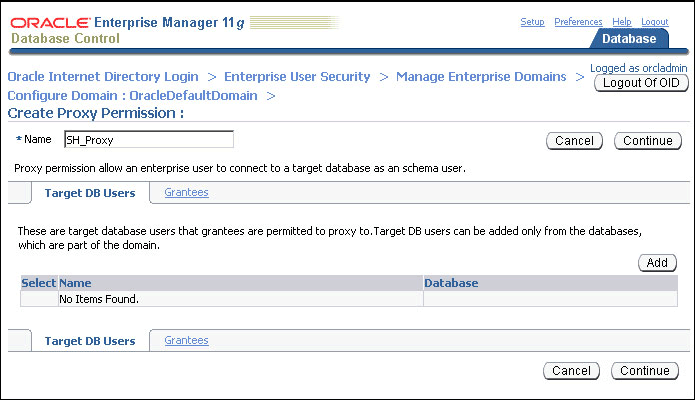
The Create Proxy Permission page appears.
-
Enter SH_Proxy, as the name of the proxy permission, in the Name field.
-
Ensure that the Target DB Users tab is selected. Click Add.
The Search and Select window appears.
-
Log in to the database that contains the
SHuser. A list of all database users that have been altered to allow enterprise user proxy is displayed. -
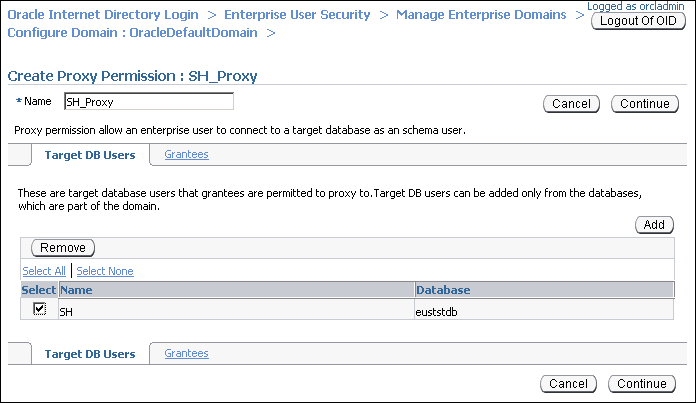
Select the SH user. Click Select.
The
SHuser is added under Target DB Users in the Create Proxy Permission page. -
Click the Grantees tab.
-
Click Add.
The Select Users or Groups window appears.
-
Select
cn=users,dc=us,dc=oracle,dc=comunder Search Base. SelectUserunder View. Click Go.A list of users under the subtree,
cn=users,dc=us,dc=oracle,dc=comis displayed. -
Select
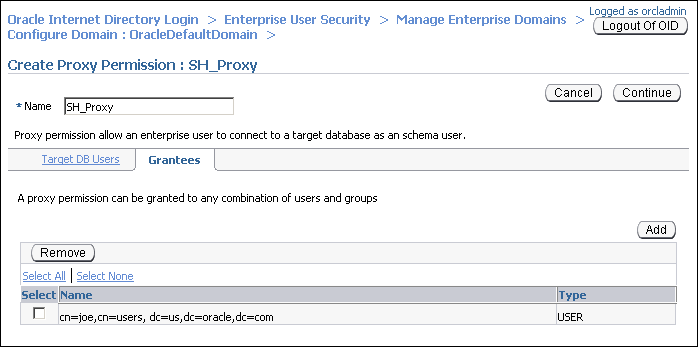
cn=joe,cn=users,dc=us,dc=oracle,dc=com. Click Select.The user
joeis added under Grantees in the Create Proxy Permission page. -
Click Continue in the Create Proxy Permission page.
The proxy permission,
SH_Proxyis added in the Configure Domain page. -
Click OK.
The enterprise user, joe can now log in as the local database user SH. The following SQL statements illustrate this:
SQL> REMARK Joe uses his own password to connect as the local database user, SH.
SQL> CONNECT joe[SH]
Enter password:
Connected.
SQL> SELECT * FROM SH.sales WHERE cust_id=4;

   PROD_ID    CUST_ID TIME_ID   CHANNEL_ID   PROMO_ID QUANTITY_SOLD AMOUNT_SOLD
---------- ---------- --------- ---------- ---------- ------------- -----------
        37          4 31-MAY-00          3        999             1       60.43
        39          4 31-MAY-00          3        999             1       38.45
        40          4 31-MAY-00          3        999             1        48.1
...
...
72 rows selected.
